


How to Order a Web Hosting Plan at Valla Hub
This guide will help both new and existing customers order a web hosting plan at Valla Hub. If you’re an existing customer, you can jump directly to your instructions here. Let’s get started!
For New Customers
1. Go to the Web Hosting Page
Visit Valla Hub’s homepage and look at the top menu. Click on “Web Hosting”.

2. Choose Your Hosting Plan
You’ll see three hosting plans: Lite Plan, Pro Plan, and Elite Plan.

Need help choosing?
- If you’re just starting out or running a small site, the Lite Plan is a great, affordable option.
- For businesses with multiple websites or more traffic, the Pro Plan offers a good balance.
- The Elite Plan is ideal if you need the most space, bandwidth, and want to handle a lot of traffic.
Once you decide, click “Purchase Plan”.
3. Choose a Domain
After selecting your plan, choose how you'd like to set up your domain:

Click “Continue” to proceed.
4. Configure Your Hosting
On the next page is where you'll set up your hosting billing cycle:

Billing Cycle: Choose how often you want to be billed.
Order Summary: Review your plan.
Click “Continue”
5. Domain Configuration
Review your domain settings and consider these add-ons:

Click “Continue” to proceed.
6. Review & Checkout
Double-check your Order
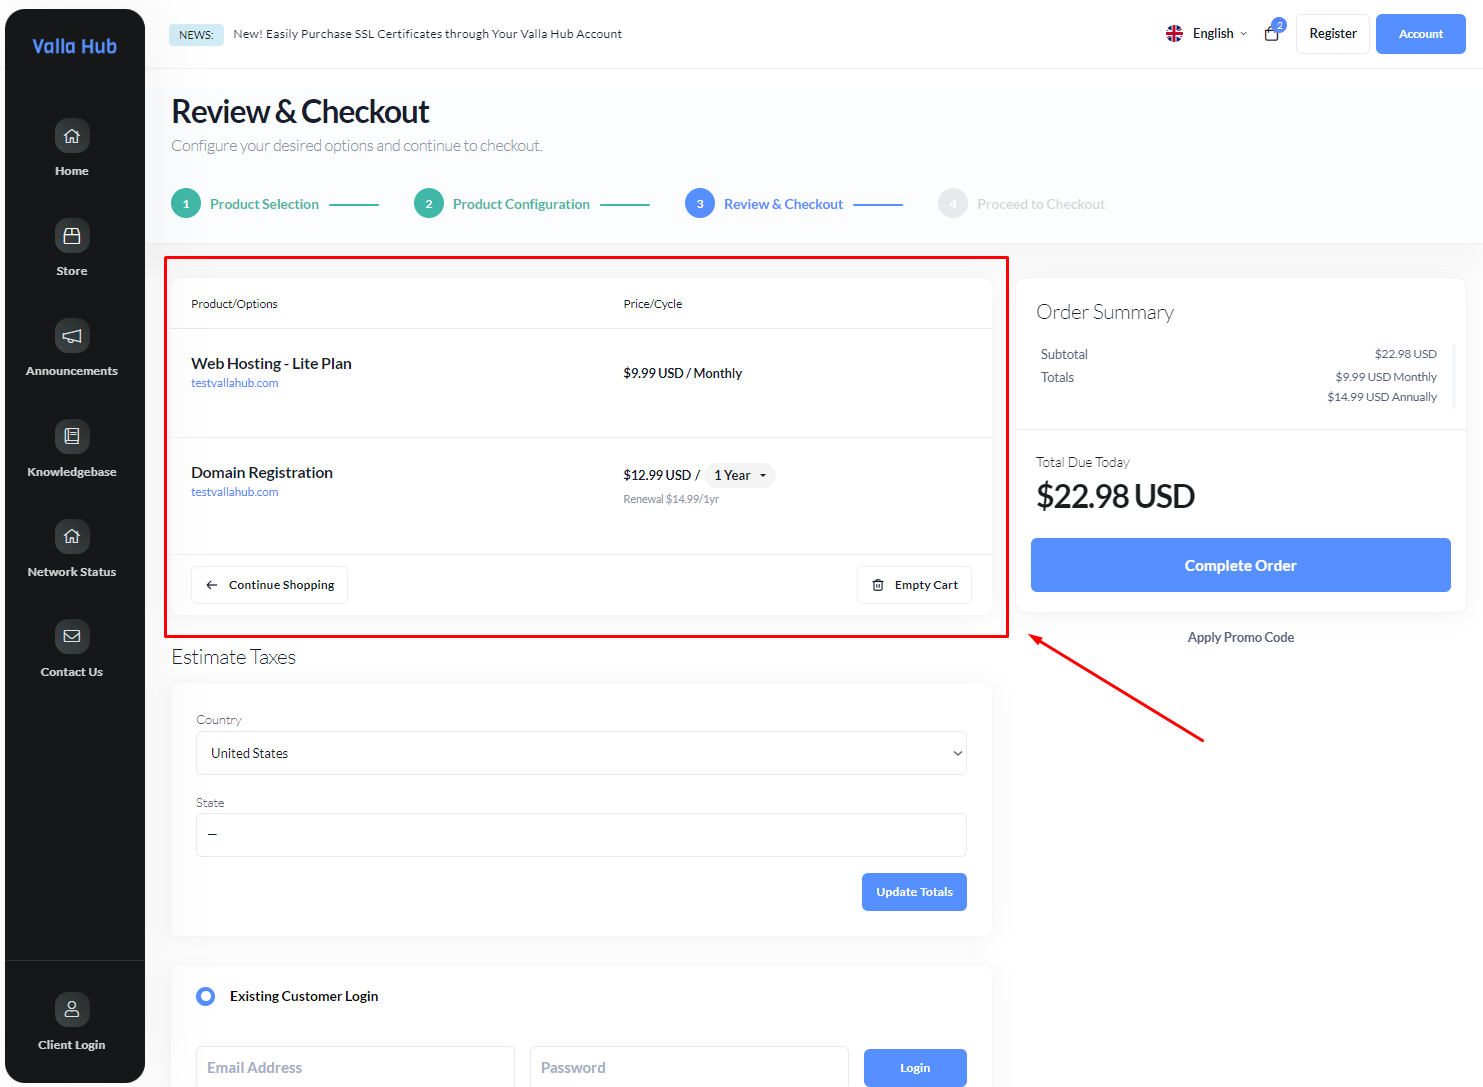
On the same page, scroll down and fill in your information. Make sure to select "Create New Account":
- Personal Details: Name, email, etc.
- Billing Information: Your billing address.
- Domain Registrant Information: If registering a domain.
- Payment Method: Choose how you’d like to pay.
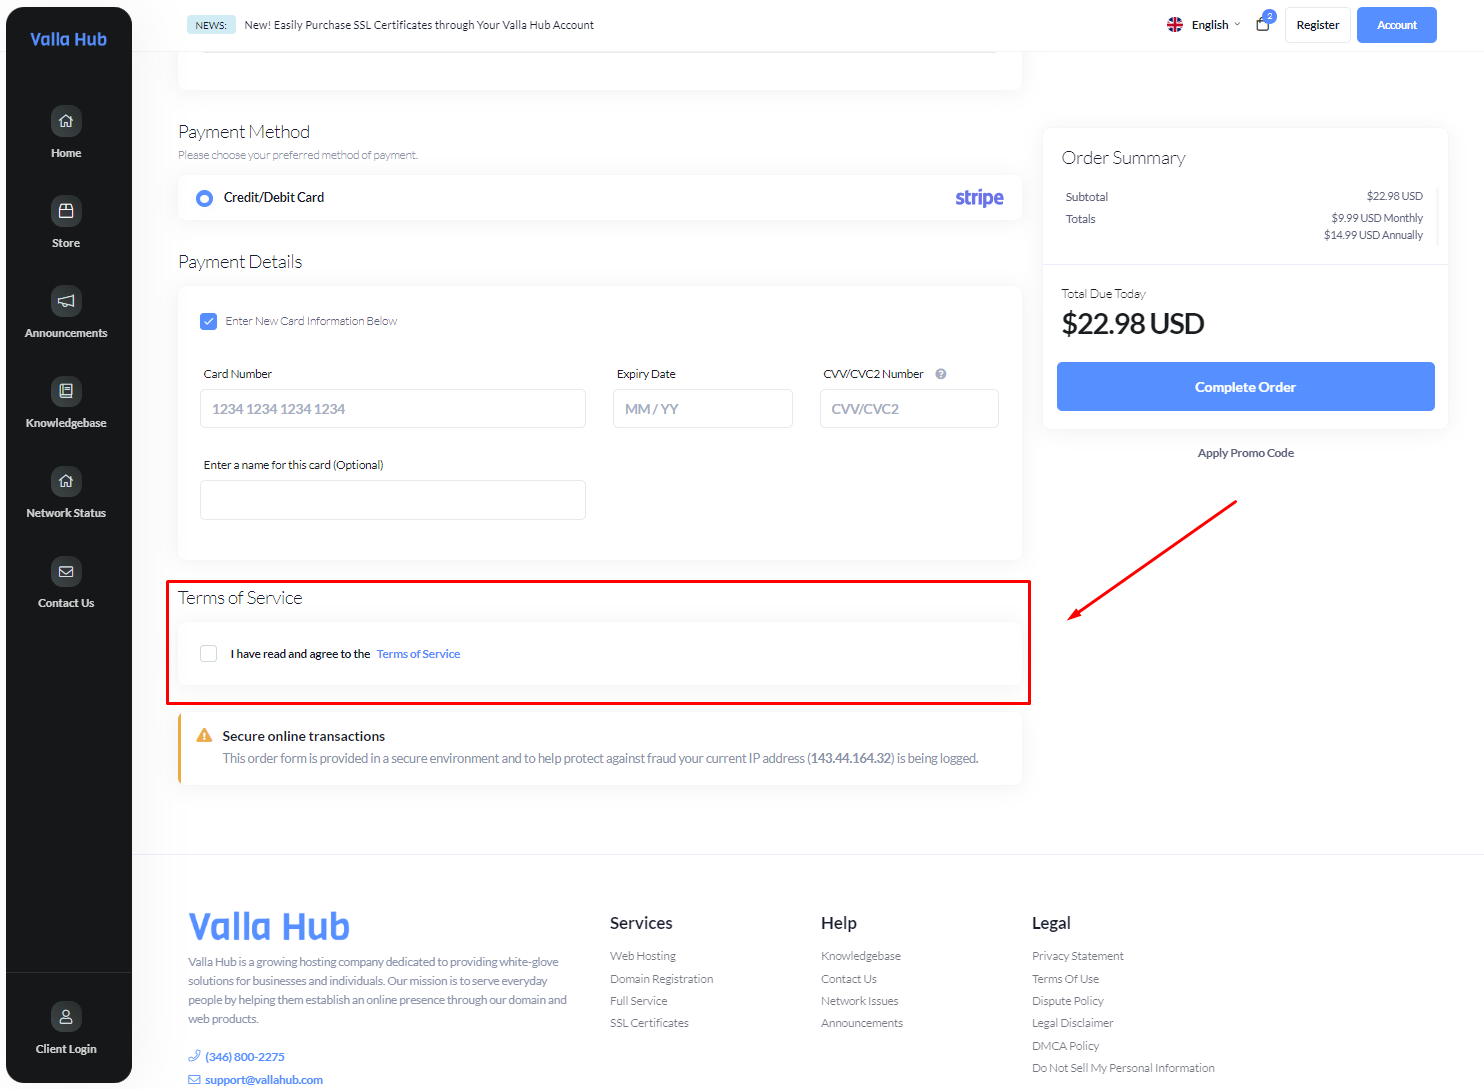
Make sure to agree to the Terms of Service and click “Complete Order”.
What Happens Next?
You’ll receive a confirmation email with:
- Your invoice.
- Login details for your hosting account.
- Instructions for managing your hosting.
For Existing Customers
If you’re an existing customer and already logged into your Valla Hub dashboard, follow these steps to order a new hosting plan.
1. From Your Dashboard
In your Dashboard, click on the Services dropdown in the top menu and select “Order New Services”.

2. Choose Your Hosting Plan
Similar to new customers, select the hosting plan that suits your needs from LaunchPro Bundle, Lite Plan, Pro Plan, or Elite Plan.
3. Complete the Checkout Process
The steps are the same - you’ll select a domain, configure your plan, and proceed to checkout.
What Happens Next?
After completing your order, you will receive a confirmation email with your invoice and your hosting login details.
And that’s it! You’re all set to start building your website with Valla Hub. If you have any questions, our support team is just a click away!
Need Extra Help?
Check Out Our Full Service Option!
If you’d rather have a professional handle everything for you, consider our Full Service option. This is a white-glove service where we’ll assist you every step of the way—from domain registration to web development. We’ll make sure your site is set up exactly how you want it, without the stress.